Worm composting is using worms to recycle food scraps and other organic and natural material into a valuable soil amendment called vermicompost, or worm compost. Worms consume food scraps, which become compost as they move through the worm’s body. Compost exits the worm through its’ tail end. This compost may then be applied to grow plants. To comprehend why vermicompost is good for plants, remember that the worms are eating nutrient-rich fruit and vegetable scraps, and turning them into nutrient-rich compost.
Materials to use (and avoid) in a classroom worm bin
For millions of years, worms have been hard at work wearing down organic materials and returning nutrients to the soil. By bringing a worm bin into the classroom, you are simulating the worm’s role in nature. Though worms could eat any organic material, certain foods are better for the classroom worm bin.
We recommend using only raw fruit and vegetable scraps. Stay away from meats, oils and milk products, which are more complex materials than vegetables & fruits. Thus, they take longer to break down and can attract pests. Cooked foods are often oily or buttery, which can also attract pests. To get more information about Worm Composter
Avoid orange rinds and other citric fruits that are too acidic, and can attract fruit flies. Make an effort to use a range of materials. We have found the more vegetable matter, the better the worm bin. Stay away from onions and broccoli which tend to have a strong odor.
Setting up a worm bin
Setting up a worm bin is easy. All you need is a box, moist newspaper strips, and worms. To figure out how to install a worm bin, first consider what worms need to live. If your bin provides what worms need, then it’ll be successful. Worms need moisture, air, food, darkness, and warm (but not hot) temperatures. Bedding, made of newspaper strips or leaves, will hold moisture and contain air spaces necessary to worms.
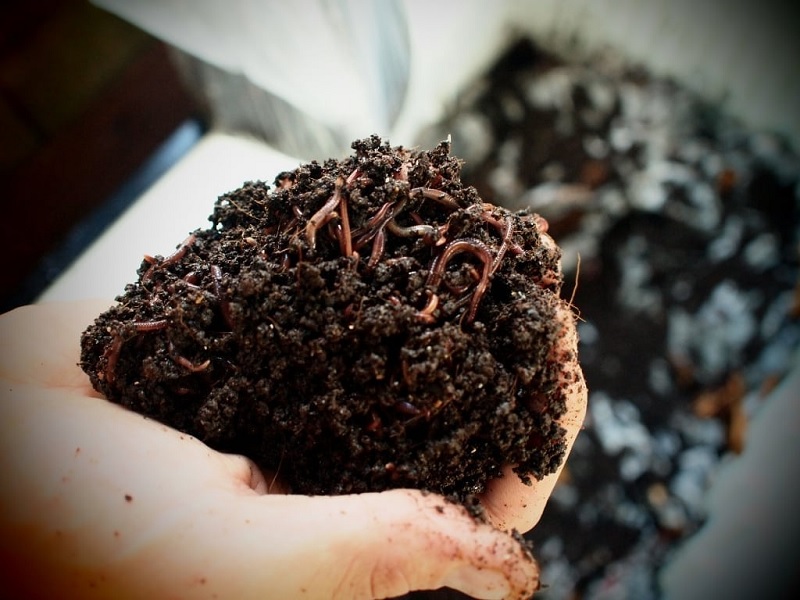
You should use red worms or red wigglers in the worm bin, which is often ordered from a worm farm and mailed to your school. The scientific name for both commonly used red worms is Eisenia foetida and Lumbricus rubellus.
Containers
When choosing a container in which to compost with worms, you have to keep in mind the volume of food scraps you wish to compost, and where the bin will be located. A good size bin for the classroom is a 5- to 10- gallon box or approximately 24″ X 18″ X 8″. The box should be shallow rather than deep, as red wigglers are surface-dwellers and prefer to stay in the top 6″ of the soil..
Whether you choose a plastic, wooden or glass container to use as a worm bin is a matter of personal preference based mainly on what’s available. Some teachers have extra aquariums available. Some have wooden boxes which they would like to reuse. Others may prefer to buy or reuse a clear plastic container, such as commercially made storage bin (e.g. “Rubbermaid,” “Tucker,” “Sterilite”).
No matter what material you select, make sure you rinse out the container before using. For wooden bins, line the bottom with plastic (e.g. from a vinyl bag or old shower curtain). Cover the bin with a loose fit lid. This lid should allow air in to the bin.
Harvesting
If you manage your worms and create a good environment on their behalf, they will work tirelessly to consume your “garbage” and produce compost. As time progresses, you will observe less and less bedding and much more and more compost in your bin. After 3-5 months, whenever your bin is filled with compost (and very little bedding), it is time to harvest the bin. Harvesting means removing the finished compost from the bin. After almost a year, worms need to be separated from their castings which, at high concentrations, create an unhealthy environment to them.
To prepare for harvesting, do not add new food to the bin for two weeks. Then try one of two methods for harvesting:
Push all of the worm bin contents to 1 half of the bin, removing any large pieces of undecomposed food or newspaper. Put fresh bedding and food scraps in empty side of bin. Continue burying food scraps only in freshly bedded half.
Over the next 2-3 weeks, the worms will move to the new side (where the food is), conveniently leaving their compost behind in one section. When it has happened, remove the compost and replace it with fresh bedding. To facilitate worm migration, cover only the new side of the bin, creating the old area to dry out and encouraging the worms to leave the old side.
Using worm compost
You can use your compost immediately, or you can store it and put it to use through the gardening season, or whenever. The compost can be directly combined with your potting soil or garden soil as a soil amendment, which makes nutrients designed to plants. Or, the compost can be used as a top dressing for your indoor or outdoor plants.
You can also make “compost tea” with your compost. Simply add 1-2″ of compost to your water can or rain barrel. Allow compost and water to “steep” for every day, mixing occasionally. Then water plants as you normally would. The resulting “tea” helps make nutrients already in the soil designed to plants.